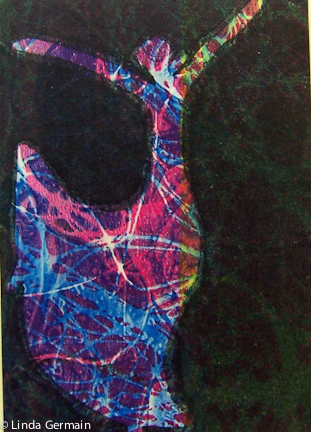
If you are a gelatin printer like me then you end up with a stack of papers or prints that have potential but are not really a finished product. One way to “finish” a gelatin plate print is to print a final layer of black over the chaotic composition. Here’s my 6 gelatin printing tips:
- The final composition in black is pleasing. Lay down the stencils so they create a design that you like.
- The black is very black
- The underlying inks are dry
- The underlying “chaos” does not have big white shapes
- The underlying “chaos’ is mostly textural
You can watch my Paper Doll Dresses video with this new information and you will see several prints made with this technique.
Gelatin prints are really very experimental so I advise to have fun first, try things with an open mind and you will probably invent a technique of your own. If you do, please share it. I always love to see what other people come up with. Enjoy!
This has all kinds of applications. Wonder if we could do that with LIFE. 😉
Thank you for sharing. It’s given me an idea of an art project to do with my son who has autism.
Fantastic Dixie! It is great how we can inspire each in way we can’t even image. Enjoy!
great idea – how’d you know I was just looking at my “pile”! I might try this with white as well….
How do you get the colors in the background like that. I took a printmaking class, but it’s over and I’m trying to branch out on my own and came across gelatin plate printing, and I want to try it since I don’t have a press at home, but I have no idea where to start. 🙂
Natalie – check out my tips page and videos and then just keep experimenting You will have fun I am sure. http://printmakingwithoutapress.blogspot.com/p/gelatin-printing-tips.html
http://www.youtube.com/user/lgcreate?feature=chclk