Thanks for your interest in Gelatin Printmaking.
I find that many folks get the FREE recipe, but still do not give the process a try. So I wanted to make it really easy for you to experiment with making monotypes with the gelatin plate.
Four things get in the way of making the plate:
- Time
- Space
- Money and
- Fear and doubt
Today, I want to remove all those factors and get you making monotypes.
Action is the goal.
Save the more permanent recipe for a later date.
Today, let’s make a small 5″ by 7″ that you can start printing with tomorrow.
I am guessing that you watched the free video and read the instructions for how to make the glycerin and gelatin plate. The concept is the same, but we are going to simplify it to remove the barriers and make the plate and get printing tomorrow.

Supplies for small 5 ” x 7″ gelatin plate = $2.00
- one box of gelatin = one oz of powdered gelatin (28 gm)
- one cup cool tap water (236ml)
- bowl
- microwave or double boiler
- rubber spatula
- piece of curtain mesh, tarlatan or cheesecloth
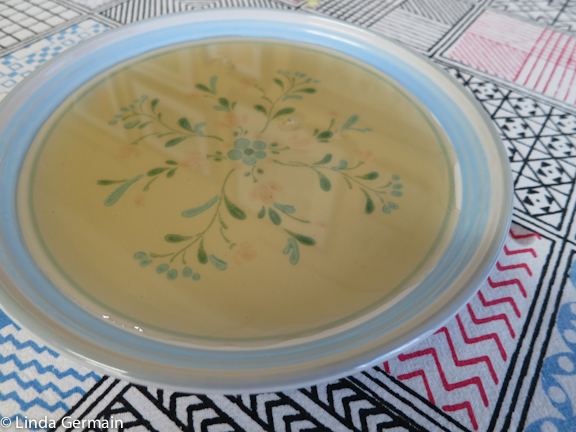
- lunch plate or foam produce tray
To make the small gelatin plate
- Place 1 cup of cool water into a bowl
- Sprinkle the 1 oz of gelatin into the water. Use the whole box not just one packet.
- Let sit for a minute or two
- Gentle pat, stir to encourage it to dissolve. Be gentle to avoid extra lumps and bubbles
- Place on pan with water like a double boiler and slowly heat to completely dissolve
- or
- Slowly microwave a little at a time, gently stirring ever 15 to 30 seconds until the powder is clear yellow and completely dissolved
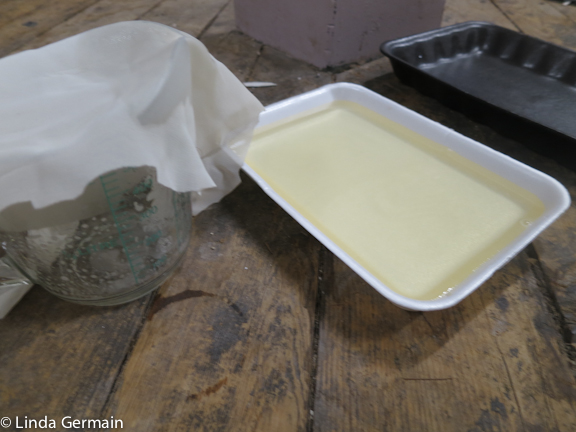
- Pour completely dissolved gelatin from bowl into a measuring cup (so it will be easier to pour through the mesh)
- Stretch mesh over the lip of the measuring cup and pour the gelatin into the level plate or foam tray
- The mesh is to catch the foam or bubbles that might be on there surface
- Let the gelatin harden. This could take 4 to 6 hours. When the gelatin is hardened place the tray in the refrigerator over night. It makes the plate stronger if you can “harden” it off in the refrigerator
- FYI – this plain gelatin and water plate does need to be refrigerated and only lasts about a month. It can be refreshed. Simply cut up, slowly microwave/melt, pour and let it set up again.
I know this is the challenging part to wait for the plate to form. But there are things that you can do while you wait.
- Clean the bowl, spatula and tools
- Collect supplies for printing
- Prepare your printing paper
- Cut some masking stencils that you can use with the small plate
- Clean up your workspace and get ready for printing
Did we remove the barriers to making monotypes?
This cost $2.00 or less, takes about 20 minutes and the small plate takes up very little space. Hopefully my instructions have given you confidence to make the plate today.
Join today and get notice of future classes.
You will also get weekly emails about printmaking, tips, tools and classes.