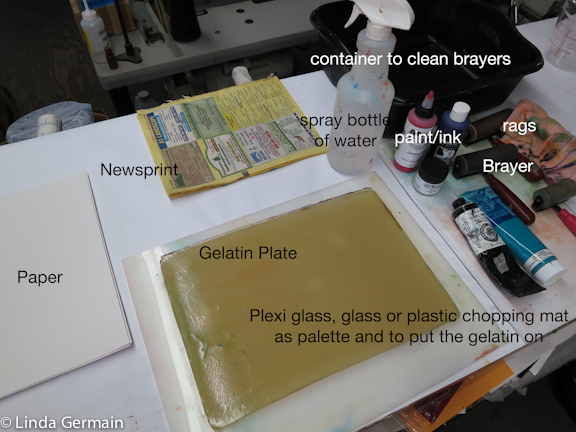
Gather your inks, paints, papers and tools
I know you are excited to get printing and you may be frustrated about having to wait for your plate to set up.
But let’s get your workspace ready so that when your plate is hardened you are ready too.
Make a workspace. It is possible to do this in a very small space, a table or desk will do.
Inks and paints:
I love speedball water based block printing ink, but I want you to use what you have and get started printing. I am guessing the most of you have acrylic craft paint, so that is what we will use.
This stuff dries a little too fast and is a bit thin to hold a delicate edge, but let’s get printing.
Paper:
Use whatever is not so precious.
I want you to be able to make lots of prints with complete freedom to experiment. I like 90 lb sulphate drawing paper. Card stock, cover stock, old book pages, and even copy paper will work.
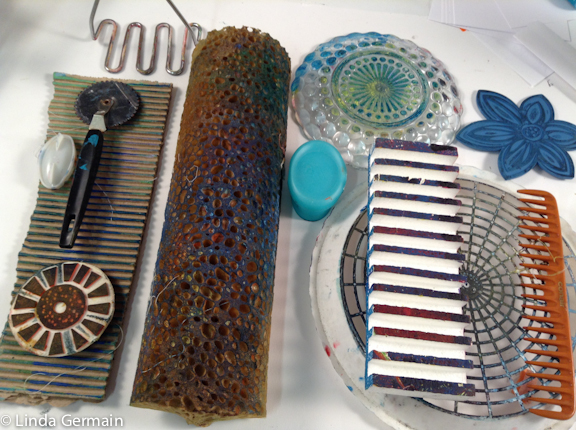 Stamping tools:
These tools are used to make marks in the thin layer of ink/paint.
The possibilities are endless, but here are 10 that I use all the time:
- Plastic caps
- Potato masher
- Cardboard
- Cut glass
- Relief stamps
- Wide combs
- Styrofoam waste
- Sponge
- pattern wheel
- Rubber coasters
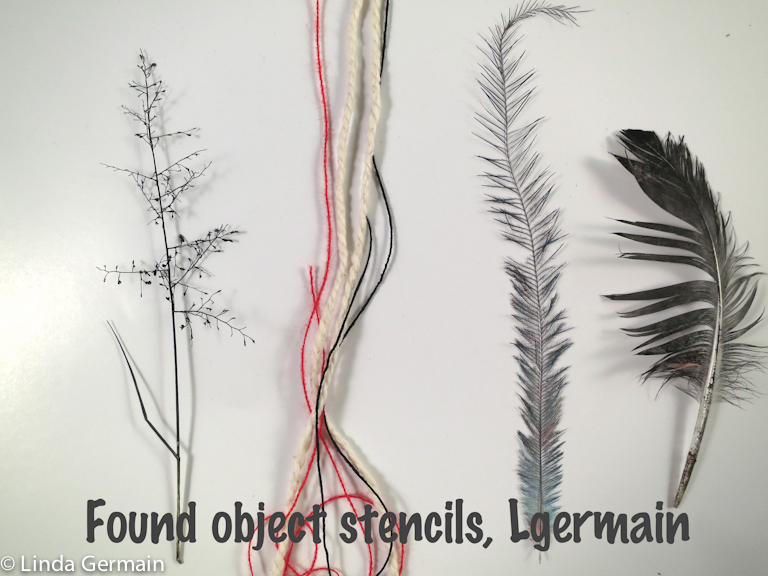 Stencils
Again the possibilities are endless, but we do not want to get bogged down looking for the perfect stencil.
Let’s find and cut a few and get printing fast.
Masking stencils block the transfer of paint/ink
Found masking stencils include, very flat leaves, grasses, threads and feathers. It is important the they be very flat and not too brittle. I love threads and thin yarns!
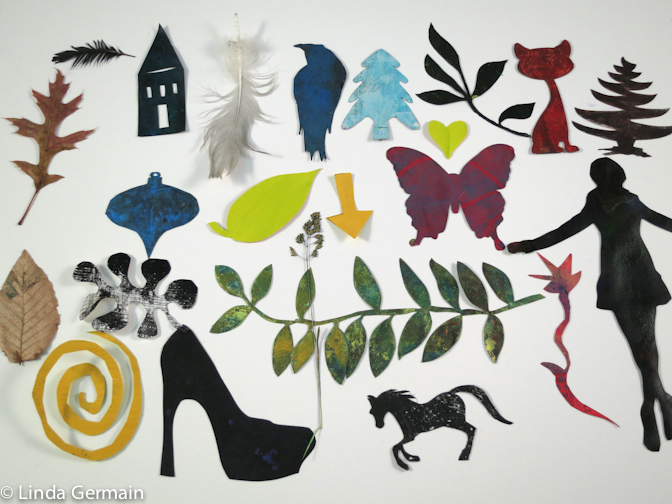 Cut Masking stencils – can be a simple as circles and other geometric shapes or as complex as figures and landscapes.
They can be cut out of paper, plastic, tyvek, mylar and a number of other materials.
Keep it simple cut 3 stencils out of a glossy magazine cover.
Glossy covers are strong enough to withstand the paint and thin enough to make a good mark.
Overwhelmed?
Then cut one simple house, a moon and find some thread and thin yarn and you have enough to play with.
Remember the goal is to get playing with the process not to be perfect.
Make sure your stencils are a good size to fit on your new small gelatin plate.
Click here and On to Step 3 Printing with the gelatin plate and acrylic paint.
Click here and go back to Step 1 making the plate
Want specific help and support check out the upcoming printmaking workshops.