Gelatin Print Project

This class is offered in 3 parts. You can sign up for all 3 or just the parts that interest you. If you choose to take more than one part I will send you a discount coupon code for $25.00 off your second and/or third section. Read the details and decide what suits you.

Gelatin Print Project Part 1

This is a good place to start.  We will build the foundation and get to know the inks and tools. You will learn to pull prints like these 4 below.

Gelatin Print Project pt1

This is the lesson breakdown:

  1. Build a light base with variety. Get the most from your brayer. Build light layers and shapes that will serve as the foundation for completed prints. Use the gelatin plate as a ink palette. Find tools to stamp into the thin layer of ink to add a mid range value to the foundation prints. Really explore what kind of marks are possible.
  2. Print with Found Object Stencils. Use found stencils  to pull a dark focus on the foundation prints. We will cycle through this lesson several times through out the class. Expand your design skills and rely on strong value changes and interesting shapes to create a pleasing print
  3. Cut Focus stencils. Masking stencils are one of the key tools. Take a day and cut a few stencils that will be the focus of your prints. .
  4. Print a dark layer with cut stencils.  Magic of layering starts to happen. Get bold impressions with interesting division of space and delicate detailed impressions.

Start with part 1 if you want to build a good foundation.

This class is not being offered at this time.

Check the workshop page for current offerings.

If you have any questions, please check out the FAQ’s page and you can find the supplies page here. Then email me with other questions. Linda (at) lindagermain (dot) com


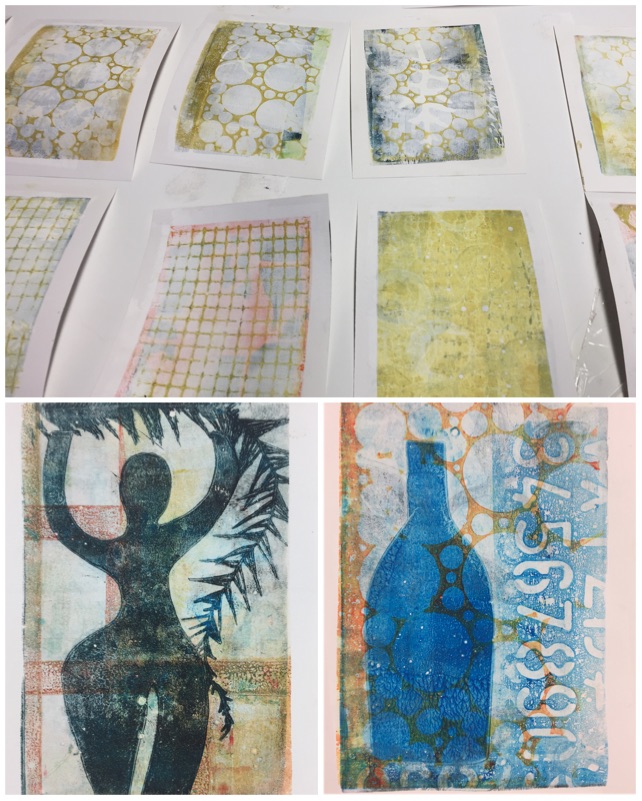
Gelatin Print Project – Part 2

In part 2 we will reclaim ugly prints, develop rich layers, cut more stencils and create completed prints. Layers and examples in these prints below.

gelatin printmaking project part 2

This is the lesson breakdown:

  1. Roll over and reclaim ugly prints.  Create a richly layered surface for this next round of prints.
  2. Folded Stencils – Explore simple folded patterns to make delicate stencils
  3. Add a delicate mark to complete. Some prints will need a little something to complete. Take advantage of the malleability of the plate and found stamping tools to add delicate details.
  4. Add a focus to roll over print – Magic of multiple layers comes to life.

Start with part 2 if you already can produce light layers and are familiar with shaped impression, detailed impressions and newsprint pick ups, and you feel like you can pull prints like those at the top of the page.

This class is not being offered at this time.

Check the workshop page for current offerings.

If you have any questions, please check out the FAQ’s page and you can find the supplies page here. Then email me with other questions. Linda (at) lindagermain (dot) com


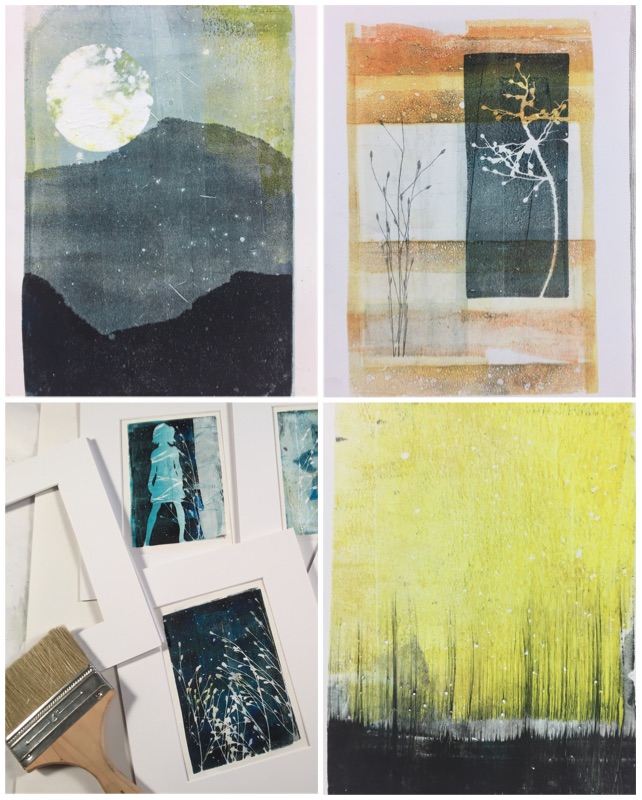
Gelatin Print Project – Part 3

In part 3, we will explore 2 different ways to create abstract landscapes, try stencil within a stencil technique and the importance of saving white space.

gelatin print project part 3

This is the lesson breakdown:

  1. Create a brayered abstract landscape. Play with just brayer marks to make a completed print
  2. Torn paper landscape – consider simple torn paper stencils
  3. Stencil within a Stencil – Divide up the space and define edges with multiple stencils.
  4. Claim some white space – Increase the range of value and create white space with stencils.
  5. Clean Edges – often we want to finish and frame a print and need to remove stray ink marks.

Start with part 3, if you are interested in abstract landscapes and the stencil within a stencil technique.

This class is not being offered at this time.

Check the workshop page for current offerings.

If you have any questions, please check out the FAQ’s page and you can find the supplies page here. Then email me with other questions. Linda (at) lindagermain (dot) com