9 lessons and make 100 gelatin plate monotype prints. You will learn and layer and transform. I am so excited about this class.
$125
Register Here Today
We will start with brayer marks and very light layers. Learn how to transfer ink from brayer to ink and to paper. We will work small and fast.
- 5 x 7 or similar size
- use framing mat
- stencils that complement each other
- texture with brayer, stamping tools, wet spritx
- lots of ghost pick ups
- delicate detail impressions
- use value – light over dark
- spritz for texture and more
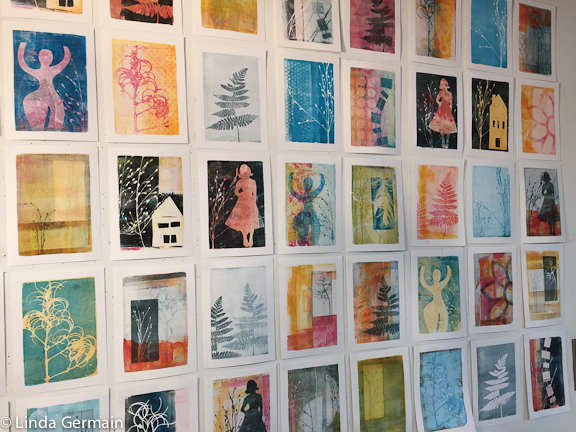
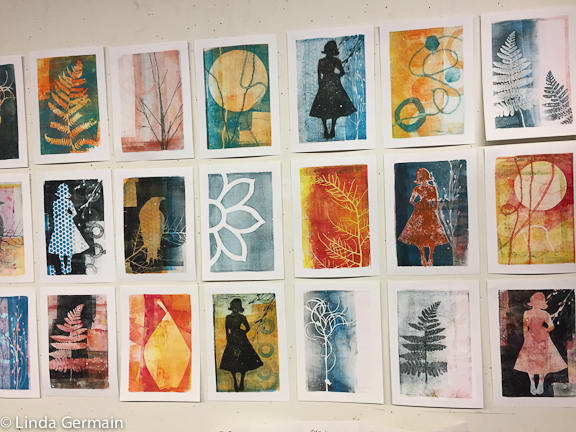
Work small and consistently and you will begin to recognize your own unique mark making style. Seeing 50 or 100 of your prints on one wall will give you a great sense of satisfaction. You will see threads that run through your prints.
Even distinctly different impressions may show your characteristic marks. Learn to embrace and use these marks to tell your visual story.
$125.00
Register Here Today
Lesson Outline:
- Build a light base with variety. Get the most from your brayer. Build light layers and shapes that will serve as the foundation for completed prints. Use the gelatin plate as a ink palette. Find tools to stamp into the thin layer of ink to add a mid range value to the foundation prints. Really explore what kind of marks are possible.
- Print with Found Object Stencils. Use found stencils to pull a dark focus on the foundation prints. We will cycle through this lesson several times through out the class. Expand your design skills and rely on strong value changes and interesting shapes to create a pleasing print
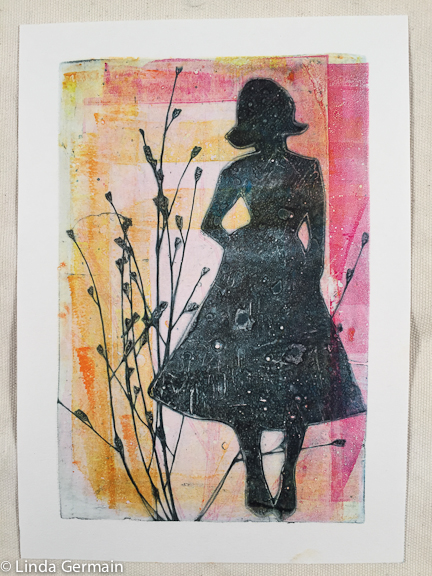
- Cut Focus stencils. Masking stencils are one of the key tools. Take a day and cut a few stencils that will be the focus of your prints. .
- Print a dark layer with cut stencils. Magic of layering starts to happen. Get bold impressions with interesting division of space and delicate detailed impressions
- Add a delicate mark to complete. Some prints will need a little something to complete. Take advantage of the malleability of the plate and found stamping tools to add delicate details.
- Roll over and reclaim ugly prints. Create a richly layered surface for this next round of prints.
- New approach – Create a brayered abstract landscape. Play with just brayer marks to make a completed print
- Add a focus to roll over print – Magic of multiple layers comes to life.
- New approach – Torn paper landscape – consider simple torn paper stencils
We will work with the homemade gelatin plate, waterbased block printing ink and 90 lb drawing paper cut to 5″ x 7″. These parameters will set the stage for lots of learning and satisfying prints.