gelatin print tips

One way to create successful gelatin prints

First, give yourself a break and embrace a definition of success that serves you. Being harsh and judgmental does not help.

gel print with stencil and ferns

One example of a definition of success that serves the players is the Baseball players batting average. Can you believe that these guys get paid big bucks and to be considered good they only need a .250 batting average? That means they only need a hit 25% of the time. Let’s embrace 25% = success.

Try this:

  • Make 10 prints with just a couple stencils and stamping tools
  • Use paper that you feel comfortable “wasting”
  • See if you get 2 or 3 out of ten that you really like

I am betting that this environment and expectation will create success for you.

silhouette fishing print by linda germain

Another Idea:

One approach that I have with those 8 less than successful prints is that

  • I come back to them on another day
  • I work into them with just a few marks or
  • I completely work over them

This really gives the prints new life and raises my “batting average” to .500. 🙂

stamping tools for gelatin printmaking

By limiting your tools you:

  • help create a cohesive composition
  • creating boundaries for discovery and success
  • eliminating chaos and confusion

ferns for gelatin printmaking

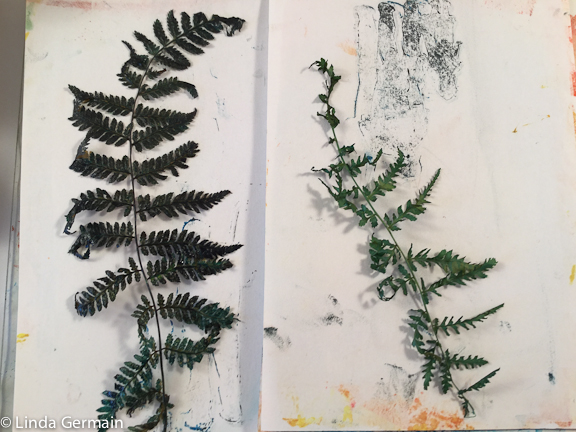
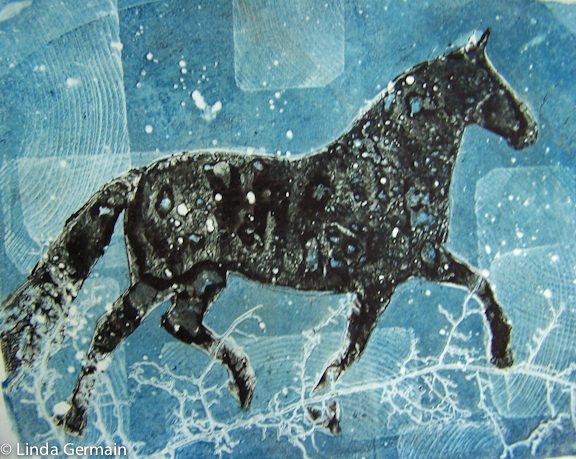
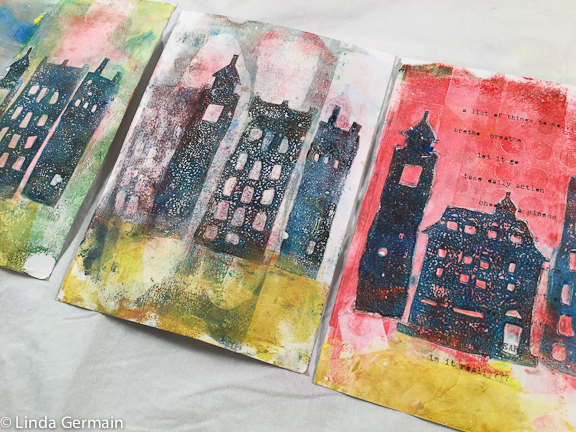
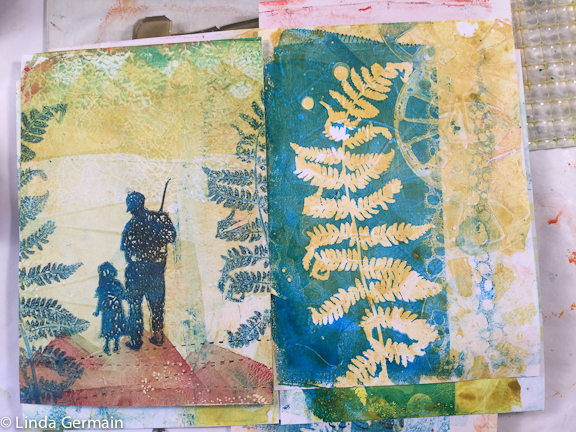
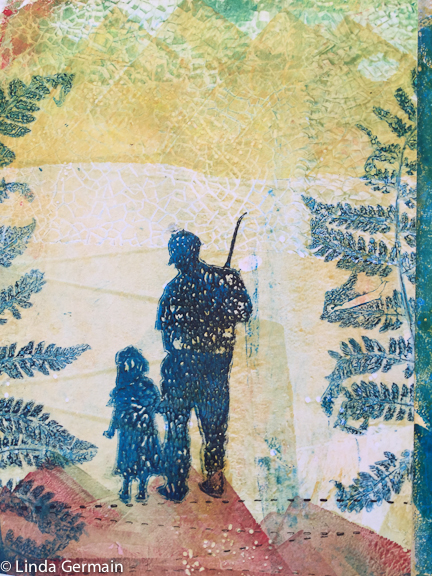
So in the prints above I used a fern, the fishing stencil and 4 or so stamping tools.

If you would like more support in creating success with gelatin printmaking, then check out the current workshops.

One student’s experience in Make Monotypes – I wanted to take this class for quite a while, but as I had already experimented a fair bit with a gel plate, I wasn’t sure how much I’d learn.

My friend, a bookbinding instructor took the class a while back, and spoke very highly of it. She really enjoyed it and learned a lot. And I had seen some of her prints that she incorporated into her bookmaking projects.

I’m very glad I took the course – it was exactly what I wanted- it encouraged me to use my own images and experiment with found objects and stencils/masks I created myself.

So many other books, videos and blog posts focused on use of commercial stencils and other products.  I really appreciate that this course focuses on finding or making one’s own tools!

Gerry McG.


One way to create successful gelatin prints Read More »

The Secret to Making Beautiful Gelatin Prints

Gelatin printmaking is a low tech printmaking process that can give you beautiful prints with out needing a big press or printmaking studio.

Gelatin plate print of horse by linda germain

The printmaking secret is:

  • willingness to let go of control
  • ability to embrace the uniqueness of the gelatin process
  • decision to make many prints
  • learn to keep what you like and
  • build on your strengths


This gelatin printmaking process is quite different than many printing techniques that require a printing press. It is:

  • spontaneous
  • immediate and
  • unpredictable

If these are qualities that describe you, your art making process or even something you admire, then you may want to explore gelatin printmaking.

gently hand the gelatin plate

It is printing on a plate of Jello®. But you don’t want to eat it!

The gelatin is a soft and malleable surface that can hold the detailed impressions that you make in it with tools like, paper stencils, real grasses, and head held tools like potato mashers and bubble wrap.

If you would like some help getting started with the process or help finding your voice and developing control, then you are in luck.

Check out the current online printmaking classes.

The Secret to Making Beautiful Gelatin Prints Read More »

Choice of printing tools – gelatin printmaking

Now a days you have lots of choices when it comes to gelatin printmaking.

strain old glycerin and gelatin plate

Then what inks or paints should you use?

That depends on the plate that you choose. Every type of plate is made of different ingredients, and therefore holds and releases ink/paint differently.

inks for gelatin printmaking

Common ink/paint choices include:

  • Speedball water soluble block printing ink
  • Acrylic craft paint
  • Golden Open acrylic
  • Screen printing ink
  • Fabric paint

My favorite combination of plate and ink is the homemade glycerin, gelatin and water plate with the Speedball water soluble block printing ink.

These two materials work well together because they are both water based. The ink stays alive long enough to be transferred from brayer, to plate, to stencils and tools and, then finally to the paper.

Series of gelatin plate monotype prints

For example, these are a few of the prints that I pulled today. The inks stays transferrable so that I can get these dark silhouettes using a technique, that I refer to as pre-inking the stencil.

This is not possible if the ink/paint dries too quickly. See the basics of the process in the video below.

The best combination of ink and plate will be the artist’s choice depending on the desired result and the use of the printed material.
Happy printing!

Choice of printing tools – gelatin printmaking Read More »

Video – basic gelatin printing – printmaking without a press

Gelatin printmaking is fast and fun.

Watch this quick video and you will see the basic moves.

You can find lots of information about gelatin printing on my site and the free recipe to make the homemade glycerin and gelatin plate.

But if you are like me and:

  • Learn faster with a teacher
  • Like to watch short actionable videos
  • Like the support of group sharing and feedback
  • Want to give your art making a little more time.

Check out the current online classes being offered.

Video – basic gelatin printing – printmaking without a press Read More »

Do you makes these mistakes when printmaking?

Stamping into the gelatin plate with found object toolsMistake #1

You think you need the perfect printmaking:

  • tool,
  • studio or
  • idea

before you get started making prints? If you pull monotype prints on the gelatin plate, then I suggest letting go of those limiting thoughts.

Quick Fix:  Leave your brayers, paper, ink and gelatin plate out on the table so you can jump in and play for just 20 minutes.

Plastic stencils to work into the ink on the gelatin and glycerin printing plate

Mistake # 2

Do you try to plan out every mark when making monotypes?

Quick Fix: Give yourself 10 sheets of paper, no more than 5 tools and 3 colors. Begin printing and embrace if you think it then try it. Even if you just try out this approach for a few printing sessions, I am sure you will be pleasantly surprised.

paint over a failed print to give it new life

Mistake # 3

You assume a “failed” print should just end up in the trash.

Quick Fix: Wait a few days and if you think the print is still not worthy then unevenly brayer white ink or paint over most of the surface. Let it dry completely. Now you have a piece of paper with some rich history and a new beginning for the print.

I hope you embrace one of these ideas and find it helpful. Need a class? CHECK out the Printmaking Workshops.

Do you makes these mistakes when printmaking? Read More »